Manual / Database and publishing
Database and publishing
Store your users' data and put the app online, with free options to start. All of this is in the app's Configure and Publish tabs.
Free database with Neon
Neon has a free plan, with backups and up to 10 projects. The connection is made in the app's Configure tab:
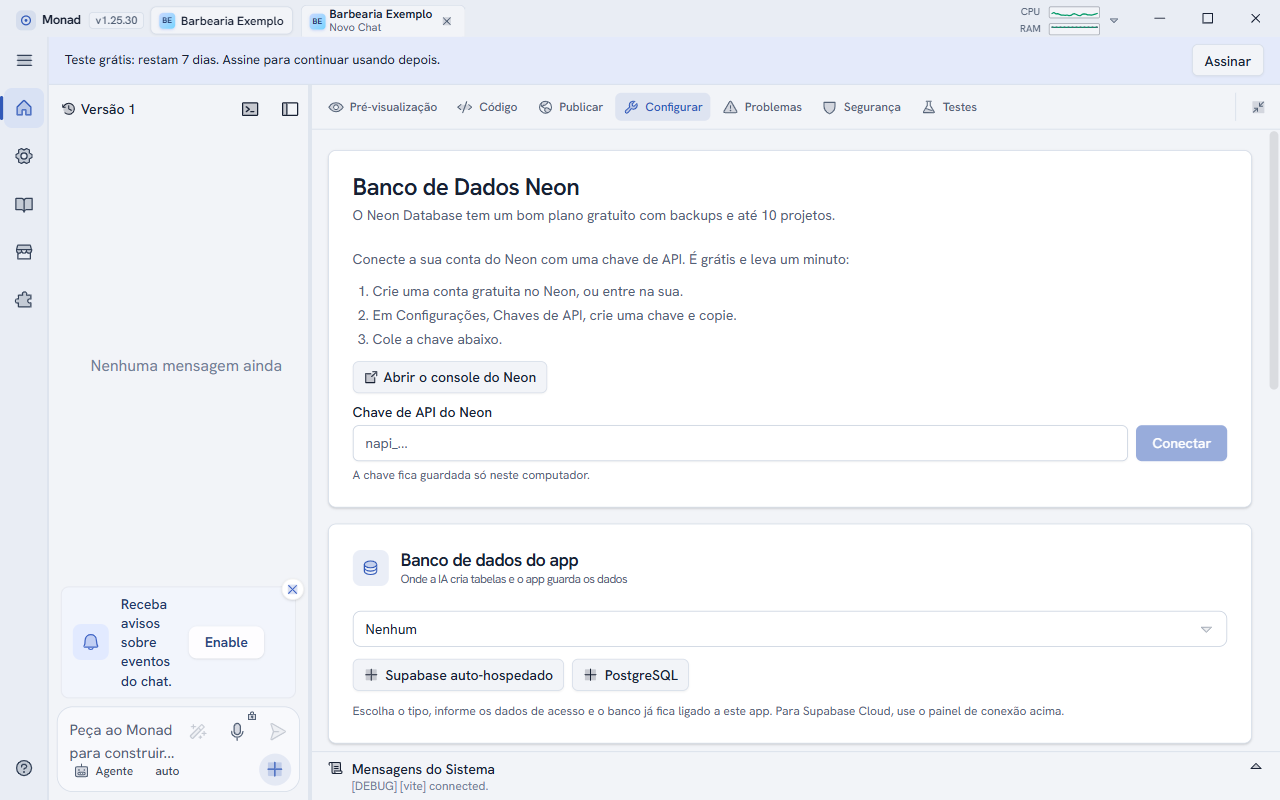
- Click Open the Neon console and create a free account (or sign in to yours).
- In Neon, go to Settings, API keys, create a key and copy it (it starts with
napi_). - Paste it into the Neon API key field and click Connect. The key is kept only on this computer.
- Ask the AI for a table, for example: "Create a clients table with name and phone".
Supabase and your own PostgreSQL
In the same Configure tab, the App database card chooses where the AI creates the tables. The Self-hosted Supabase and PostgreSQL buttons register a database of your own (enter the access details and the database is linked to the app). For Supabase in the cloud, use the connection panel in the tab itself.
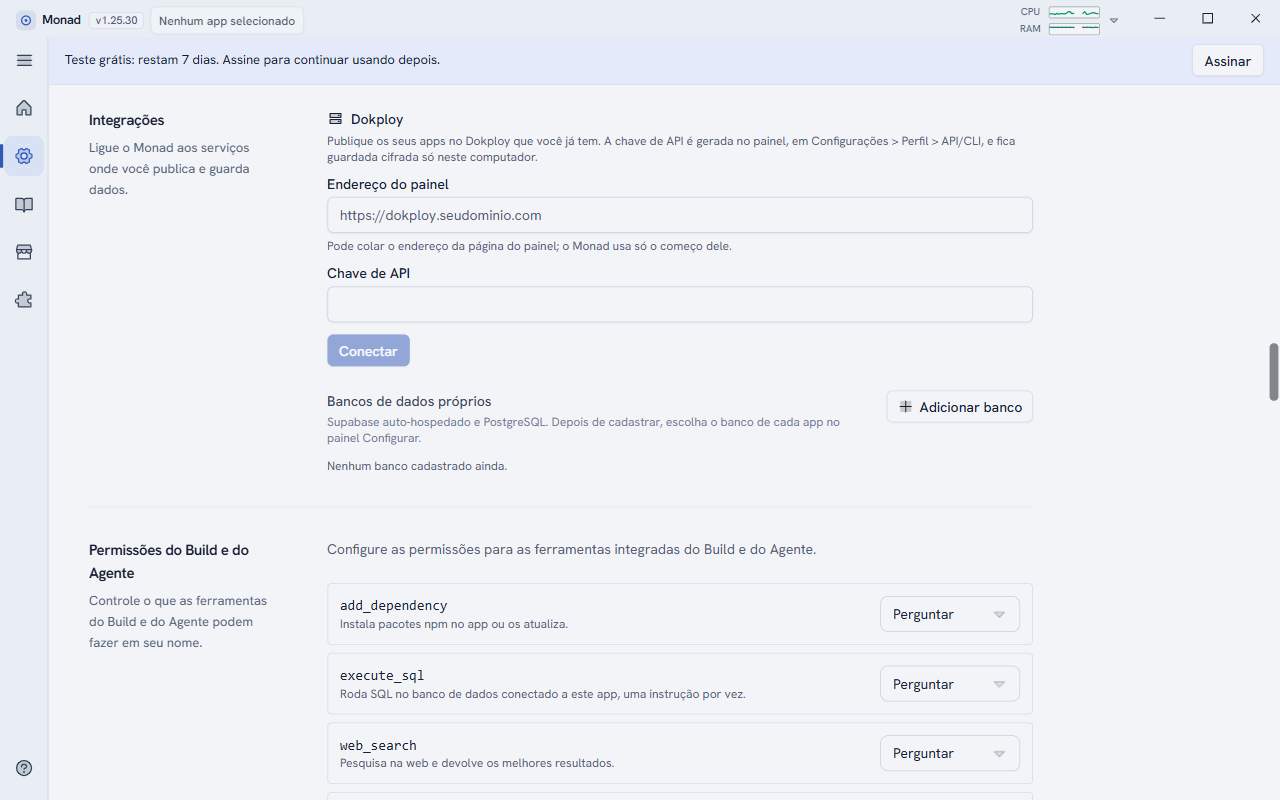
You can also register databases once, in Settings > Integrations > Your own databases > Add database, and choose later, app by app, in the Configure tab.
Publish the app
Open the app's Publish tab. It has two parts:
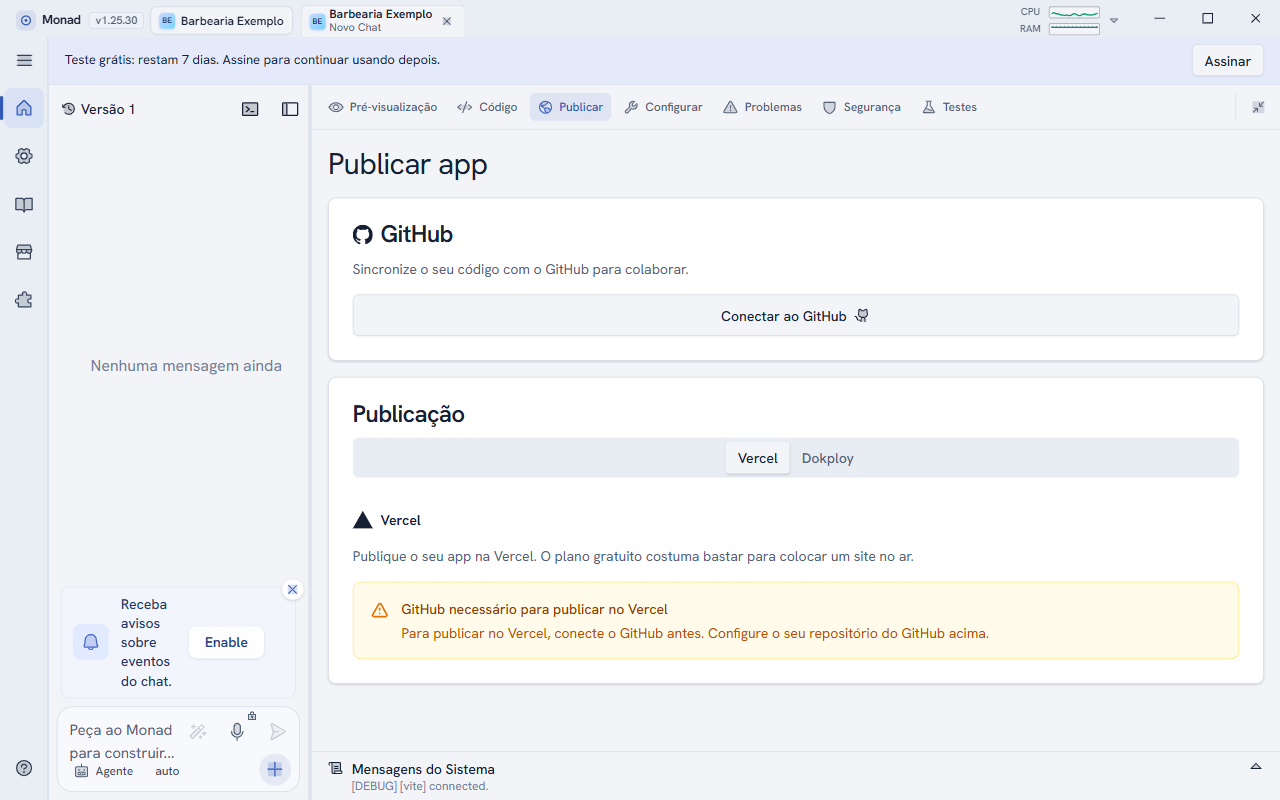
- GitHub: click Connect to GitHub and sync the code. It is required to publish on Vercel.
- Publishing: choose the Vercel tab (the free plan is usually enough to put a site online) or Dokploy (your own server).
To use Dokploy, first register the panel address and the API key in Settings > Integrations > Dokploy. The Cloudflare tab appears in Publish when the option is turned on in Settings > Experiments.
Before publishing, run the production check (see Check before publishing).